


My biggest commission to date
Northbrook Vineyard client project

In November last year, I started working with Northbrook Vineyard in Bishops Waltham, set in glorious countryside just outside Southampton.
As a new vineyard opening to the public, Northbrook aims to give the land back to nature and allow the vines to produce grapes without any human intervention - apart from picking them, of course! 60% nature, 40% vine.
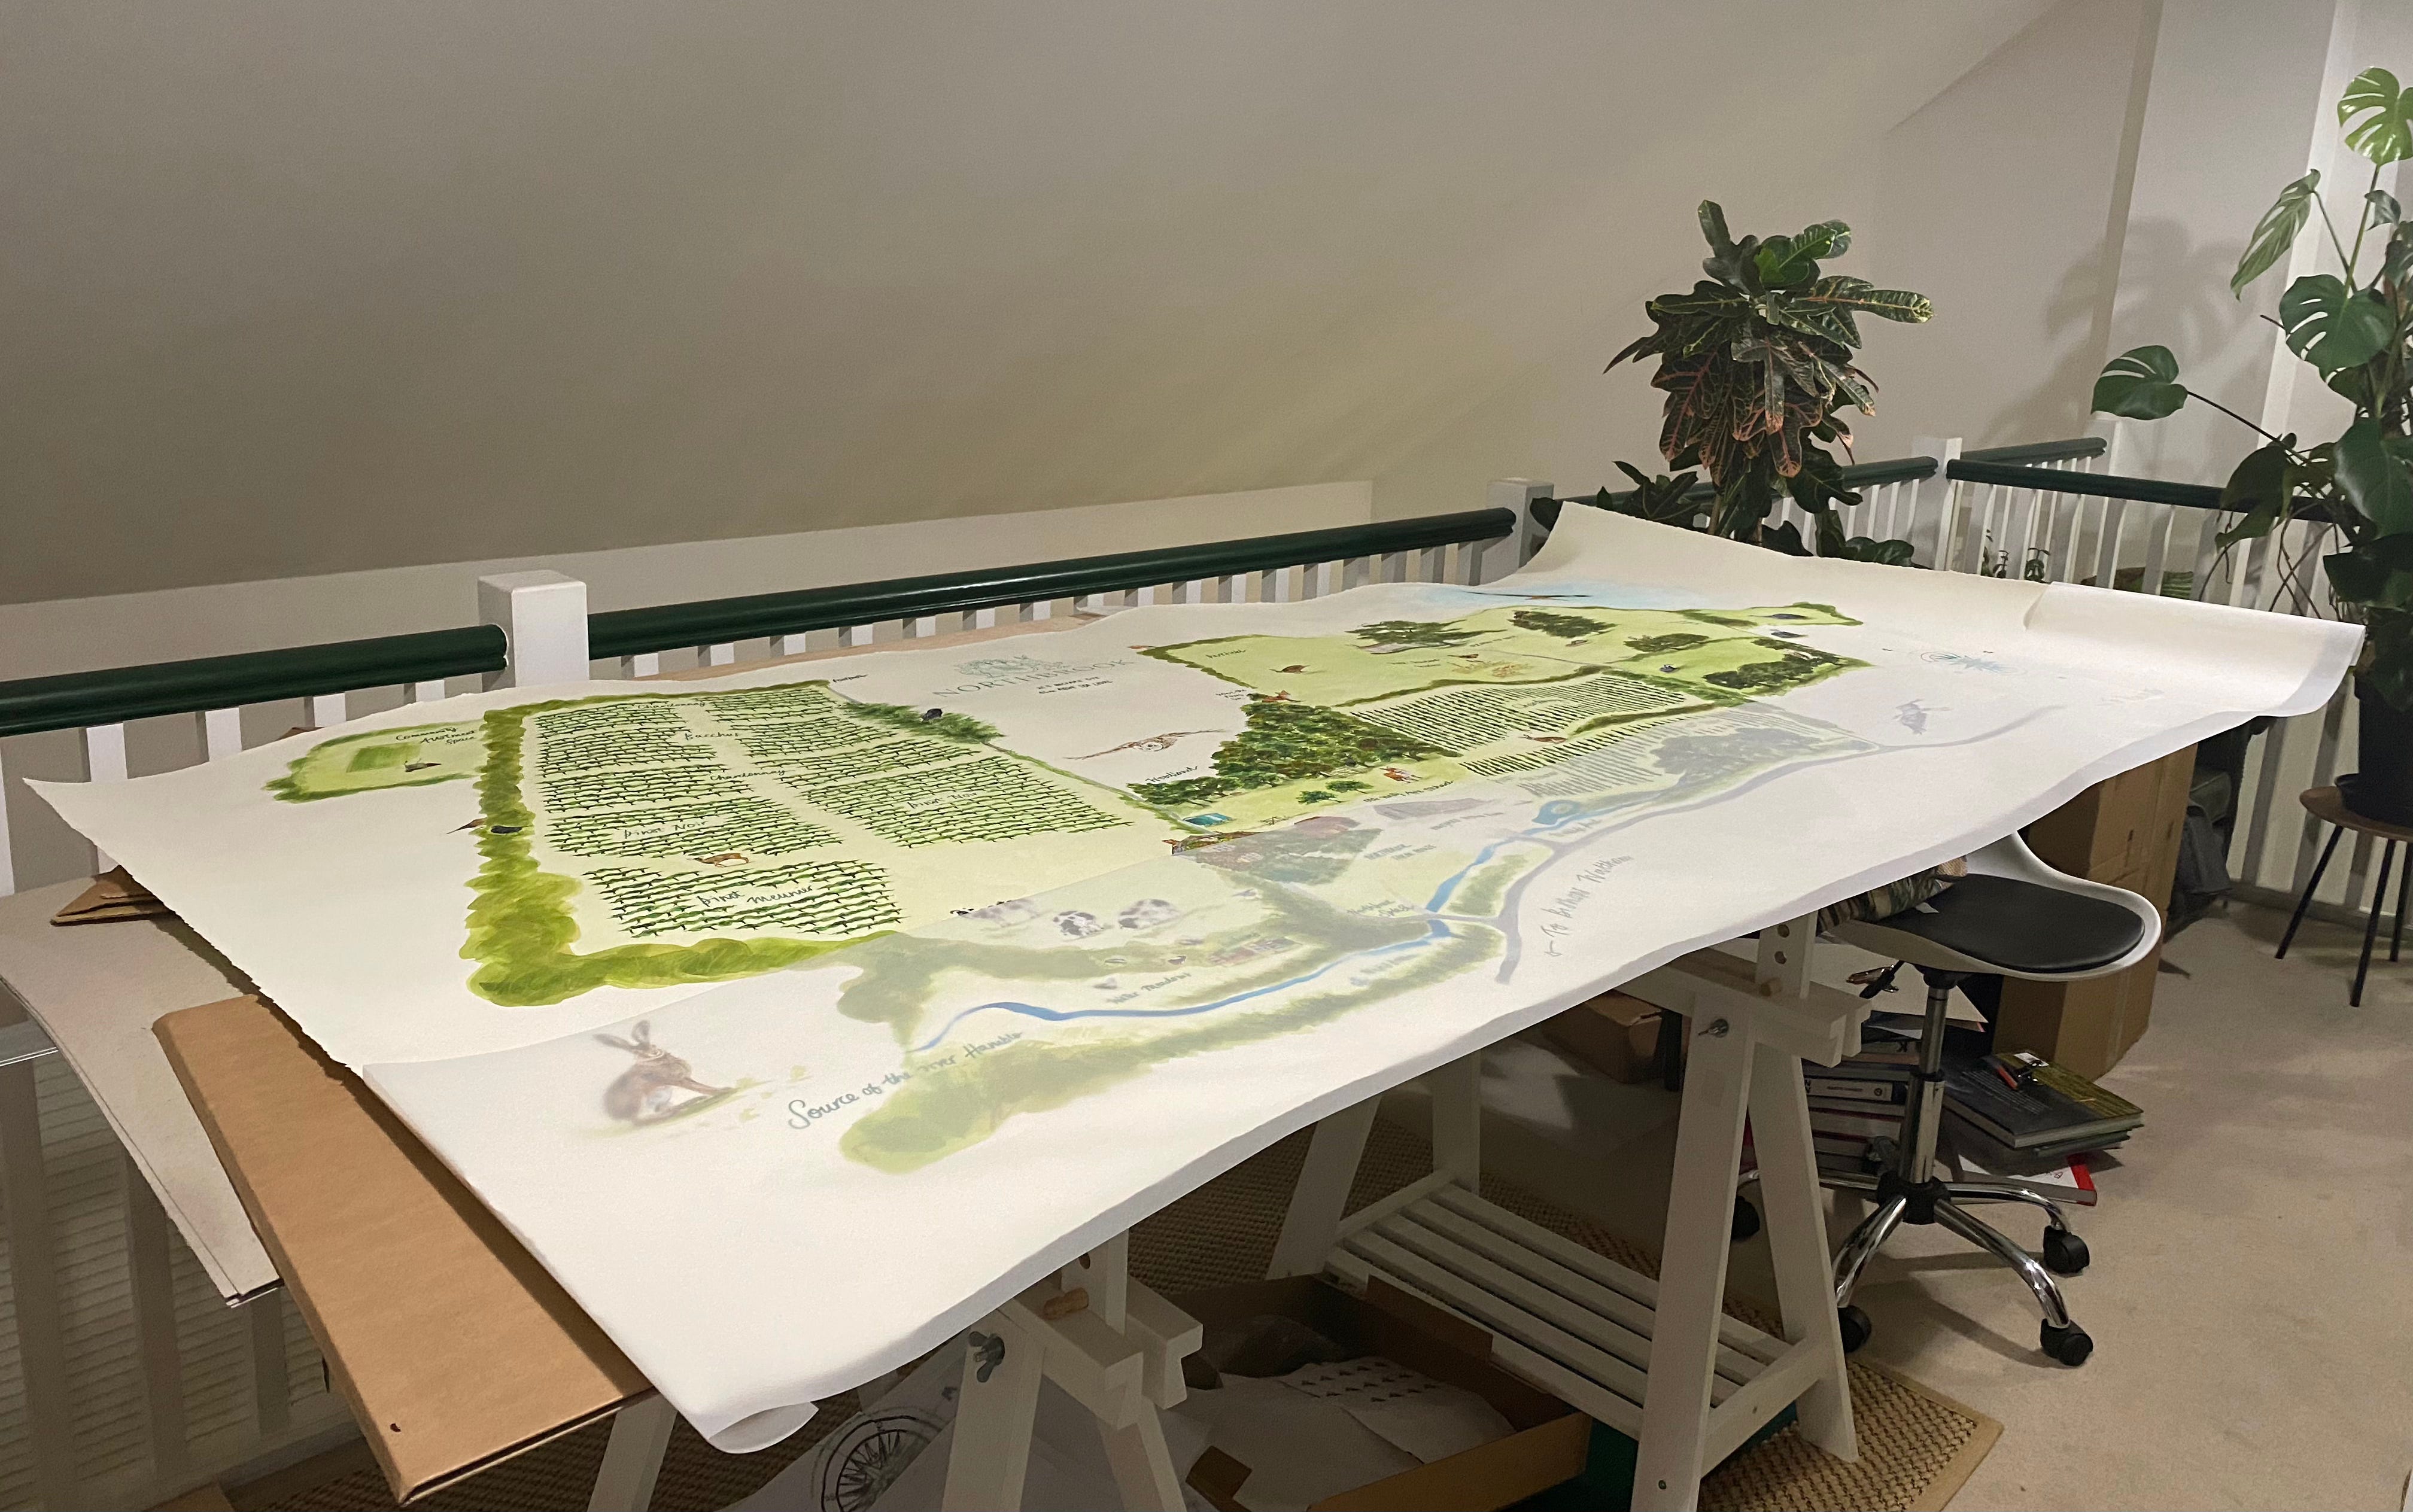
I worked with them to produce a Map of the entire estate. It’s an original piece of artwork that is 2.4 meters by 1.2 metres (yes, that’s in metres!). I used the most amazing paper by St. Cuthbert’s Mill - Saunders Waterford watercolour paper, Hot Press, in Off-White. The Map has now been framed by Frame London and it now hangs in the Tasting Room in the vineyard.
As I am sure you can imagine, it was a huge project. It took a fair amount of logistics, preparatory work, and a lot of time to make sure all of the details were right. Even just working out how to draw on media that large, that wasn’t on a canvas, and how it was going to fit it into my studio was a challenge!
I don’t know about you, but as much as I enjoy seeing finished pieces of work, I love hearing about the process just as much - maybe even more! So, let me take you behind the scenes of my biggest commission so far!
Getting details from the client, quoting, and arranging a site visit.
Whenever I am contacted by a client, I first and foremost like to create a friendly and cooperative relationship. Ultimately the people who contact you want to work with you, so be yourself. Be approachable, open to ideas, and talkative, but listen to your clients. You can’t fulfil a brief properly if you are not listening in the first place!
Of course, almost all engagements typically start via email, but if it's appropriate, scheduling a call with your client either on the phone or via Zoom is often better. It’s much easier to chat more freely, enabling you to automatically open up the channels for friendly and engaging conversations.
Quoting! A biggie I know - I should write a separate post on this alone, to be honest. However, one of my top tips (and it applied to this project) was - don’t feel pressured to give an ‘instant quote’. We are not “We Buy Any Car”!
Say to your client, “please can I take some time to consider all of the elements we have discussed and I will get back to you shortly”. All great clients won’t have any issues with you needing a bit more time, and this is what I did for this project too.
There were a great many elements to consider here including:
This was an original piece of artwork (rather than my usual client work which has a licence attached), so was actually more of a fine art brief. But several rounds of roughs plus alterations have to be considered too.
The size of this piece! So time and material considerations have to be taken into account
Any additional expenses that apply, including necessary site visits, travel to- and from- locations, etc.
I have just mentioned a site visit, and this was something that was discussed early on. Both Northbrook and I thought it would be highly beneficial for me to see the vineyard and the estate as a whole. This allowed me to not only take my own photographs for reference, but also ‘walk the ground’ to get a sense of what they wanted to achieve, and how that needed to be portrayed in the Map.
The site visit: what you need to bring and what questions to ask when you’re there
Before the site visit, there were a couple of things we had arranged together prior to the day. The first was for me to bring some paper samples to show my clients, so that I could talk through options and give them my recommendations. The second was to review an accurate Ordinance Survey Map of the estate, that we could work through together.
As I visited the estate in November, and the things I needed to consider were:
Weather! It’s the U.K - therefore likely to rain, so clothing considerations were high on the list, with a good waterproof coat, warm clothes, and walking boots or wellies considered a ‘must have’.
Taking my DSLR camera to take photographs around the estate. Don’t forget to charge all of your batteries beforehand and to make sure you have an SD card with plenty of space. Of course, you can also use your phone as well - again, just make sure it has enough charge, and bring a portable charging bank just in case!
Notebook/sketchbook/pens/pencils. However you like to note take, draw or sketch ideas - it doesn’t really matter. Just make sure you can take down the important information you discuss with the client when you’re there.
I made a list of questions in the notebook I wanted to bring with me, so that I could easily refer to them and write the answers below whilst at the site. For example, asking to see the foyer where the map was going to be hung on the wall - since it was important to see the space, the lighting, and the colours in the room.
Looking back at my own photos, researching and reading lots of documents before making a start
After the site visit, I already had lots of great information to work with from my own notes, topics, and design ideas discussed with the client, alongside my own photographs. Even though these were ‘season specific’ (because I visited in November), it was still useful for me to gauge the scale, areas of interest, space, and shape of aspects that were going to be included in the Map.
I was given a few site surveys from the client that had been conducted for research purposes. They contained key information, including graphs and visual indicators as to what kinds of species inhabited what parts of the estate. This was really helpful when it came to considering what to add to the map and where.
I was also keen to make sure the mixture of wildlife incorporated within the Map had both familiar species that are synonymous with the British countryside, as well as other species that are considered vulnerable or on critical lists. This was not only to raise awareness that we still have such species here in the U.K, but to also highlight how diverse the landscape is at Northbrook, and their positive impact on their environment.
The first roughs
I aways find this part of any project a bit nerve-racking, even though I have been working directly with clients for over 10 years! This is the part when all the ideas in your head have to come out onto the page, and - hopefully - look how you had hoped they would. Plus, not only do they need to meet the brief, but your client needs to like them too!
It’s easy to get a little overwhelmed at this stage of any project, or think you have to nail it first time. But just remember, you can’t improve on something that doesn’t yet exist. You can tweak, change, swap round, adjust, add or remove aspects in a rough that is a first draft. From the first rough, I also added an extra detail for my client - numbering all of the wildlife I had included on the Map with a corresponding key that listed all of the chosen species. This made it easier to see what mix of animals we had, enabling us to find specifically what we wanted to change, and check if we had the right amount of a particular species.
We went through three rounds of roughs in total. Given the scale of the project, I was pleasantly surprised with that! Some parts were not changed at all from the first rough, and other parts were tweaked every time until myself and the client were happy. That’s just the way it goes with roughs. But I would much rather take that time to get it right.
Another tip: make sure you factor in the time for roughs, feedback and changes in your time scale and your pricing!
Scaling to size
You might be wondering at this point…how could you do a rough and not think about scale? And how do you know if a building is too big versus, say, a tree - if you can’t draw to scale straight away?
Well… this is something that initially felt like trying to work out one of those ‘puzzle boxes’ that you can’t open (you can, they’re just ‘tricksy’). For the roughs, I knew I would have to move each of the elements around, and would need the ability to change the sizes of things quickly as edits would need to be made.
I sketched lots of different elements onto pieces of paper, scanned them all in at 300dpi greyscale, made a ‘to-life’ size PDF on Photoshop, and got to work adding in all the elements over my basic sketch from the OS map. There may be quicker ways to do this, but this one worked for me given the timeframe I needed to work to. It also meant that any future changes required could be completed quickly, as I simply had to move or adjust a layer.
I also went one stage further (because I am me, and I am ruled by details), and worked out how many landscape A4 pages the Map would be if printed out. It was 8 x A4 pages across, and 5 x A4 pages down. I went with A4 simply because I have an A4 printer in my studio, so I can easily print off parts as-and-when I wanted to. This would also prove to be very useful a bit later on…
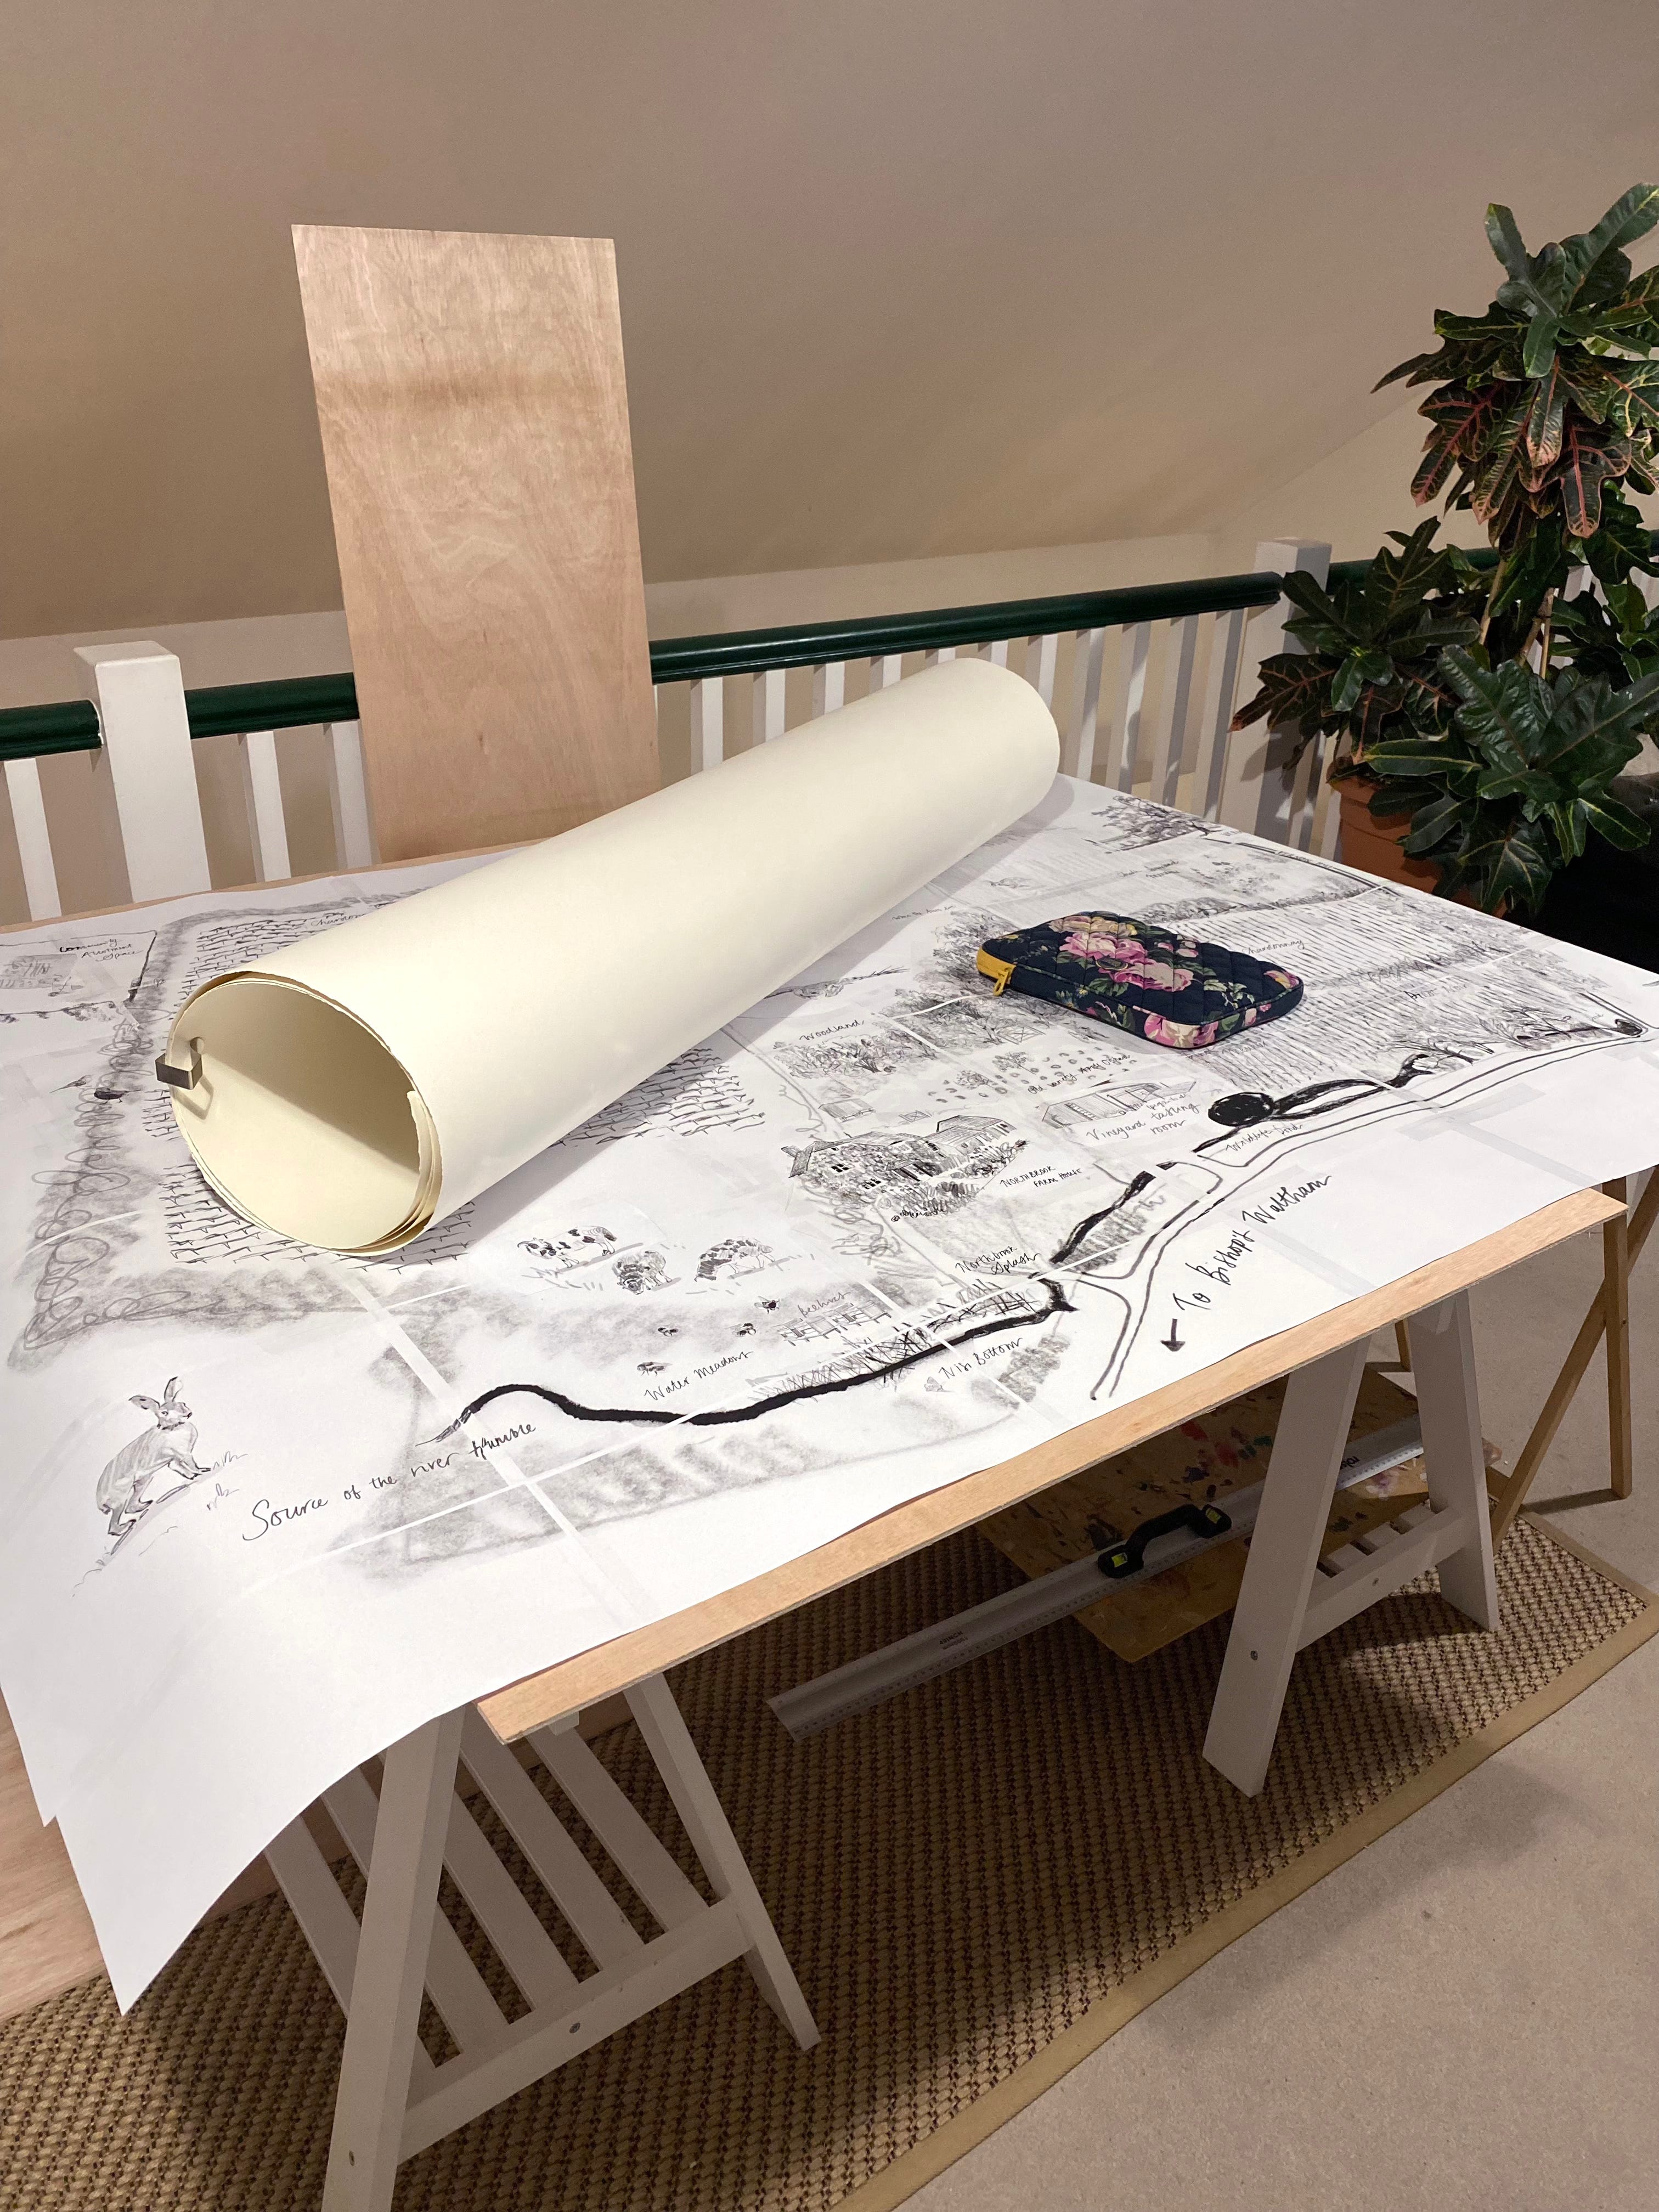
I used grid lines in Photoshop to add the dimensions of the landscape A4 pages, and instantly I could see a printable map which was the correct scale! I then printed out all 48 pages and stuck them together with sellotape. Super basic, but it worked really well! I could then see everything at the proper scale and draw back into it, making changes and edits as I go. It also meant I could just roll it up at the end of the day, so it didn’t take up my entire studio.
Cutting and deckling the paper, and prepping it ready for drawing and painting
By this time, the roughs had been approved so it was now time to cut the paper to size. The only paper big enough to handle such a large piece was St. Cuthbert Mills paper rolls! Getting that out the box and lying it down to measure it was a task in itself - but I worked out a good system, and spent time making sure my measurements were accurate before cutting.
The advantage with the paper roll was that I had spare for material experimentation, and whilst I was drawing onto it, it was easy to carefully roll and store at the end of each day.
Early on in the project, both the client and I decided it would be nice for the paper to have a ‘deckled edge’. Deckled edging is where the paper has been dampened and gently pulled apart to create a torn edge effect. I learnt how to do this, and thankfully I had spare paper to practise on before doing it on my cut piece. It is a skill of patience, I will say that! But it was worth it for the effect it gave to the piece. Plus when it was framed, it was float mounted, so that edging really stands out! *chefs kiss*
Making the first mark!
Earlier, I said that my idea of printing out the 48 A4 pages to make the rough actual size had multiple benefits! When it came to drawing out the map onto the paper, because I had already printed the final rough out to size, all I had to do was get my Lightbox and use that to help me sketch out the map. It saved me a lot of time, on what was already a time consuming job. I also have an A3 Lightbox which was a huge help.
When I sketched out the map, I mainly added shapes of where specific parts are placed, leaving the finer details until I was at the painting stage. A lot of the background was washes and textures so they don’t need to be drawn in.
With everything drawn, it was time to figure out how I was going to work on it, and I had to make that first mark… Scary!
On to the painting stage
In my studio, I am so lucky to have lots of space (for more peeks into my studio, you can read this post) but even this was a squeeze. Thankfully, I have two desks - a painting desk and a work desk - where my Mac, scanner, and printer sit. This sounds a bit indulgent, but it is also practical. I am very messy whenever I draw or paint anything. Most things in my studio have paint or ink flecks on them, which I say gives things character!
Anyway, my painting desk is just an Ikea top-and-legs combination. I took them apart and raised the legs as high as possible, added the top back, and added an extra ply board that I had cut to size at my local B&Q. My materials sat in my trolley so I could have everything next to me as I moved around the paper.
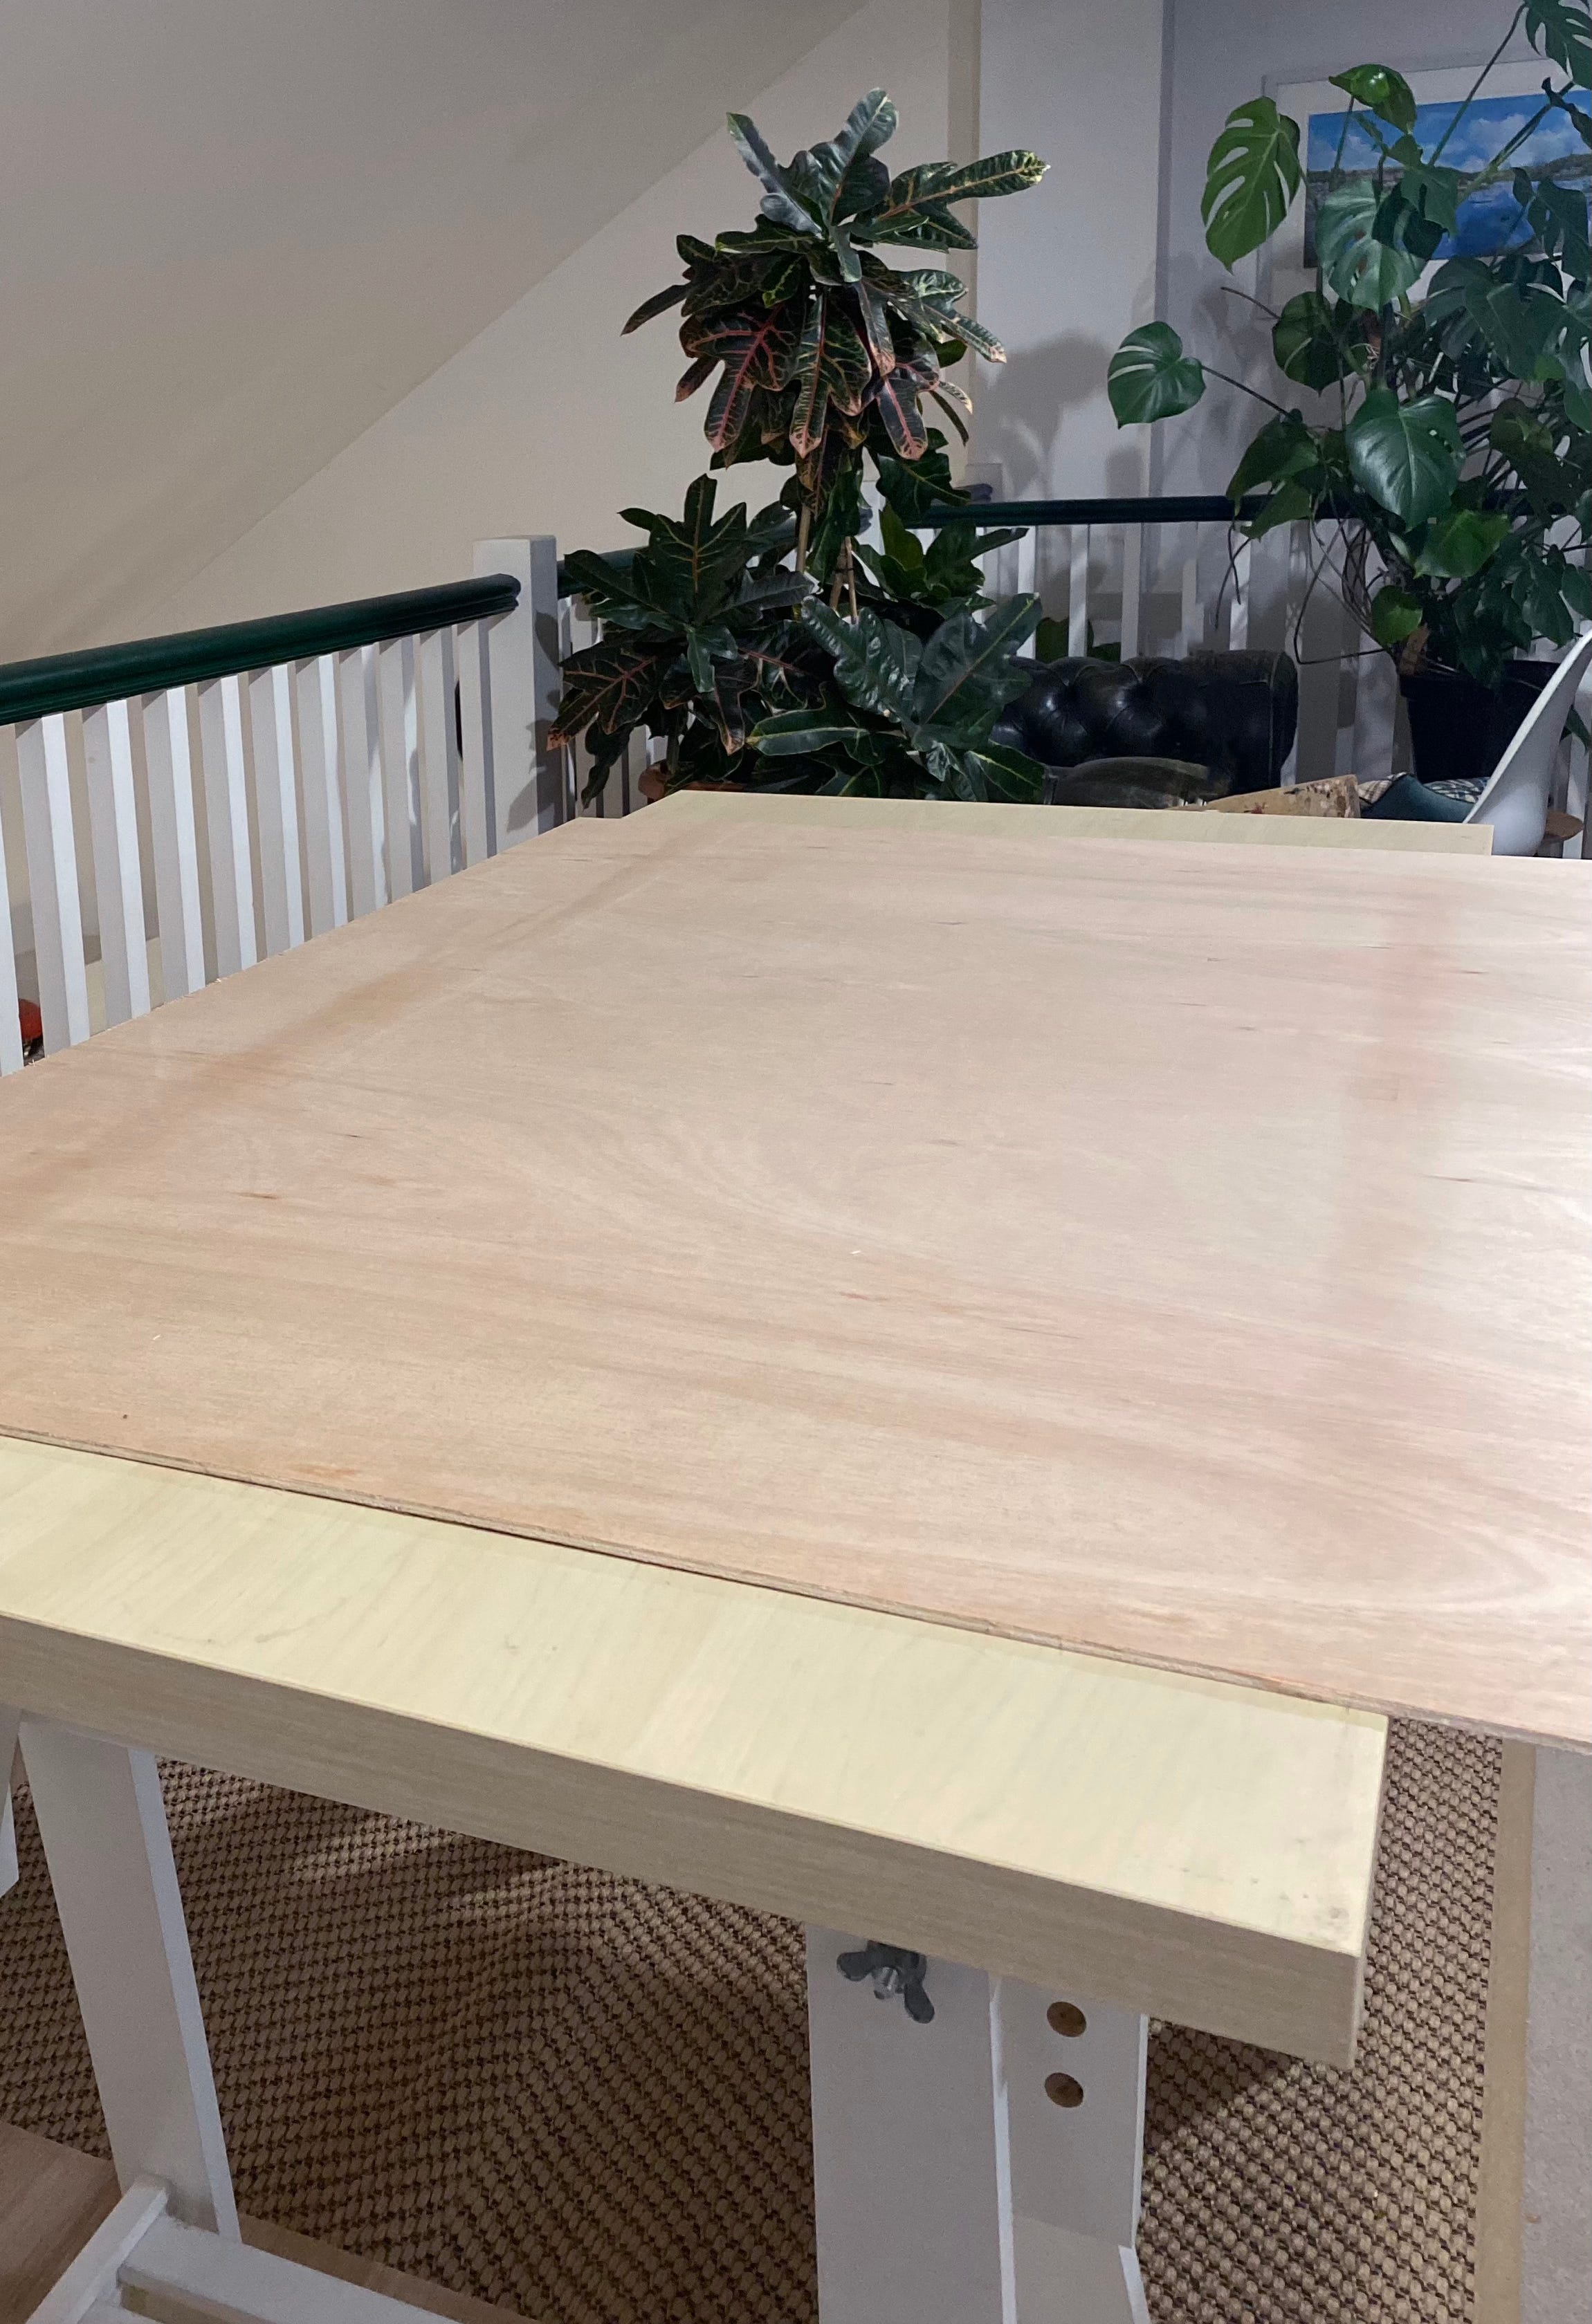
Upon reflection, I don’t think there is much - if anything - I would change if I had to work on something this large again. Of course, if you don’t use wet materials, you could use a large easel or even prop the large ply board on a couple of chairs. But I use so many inks I didn’t want anything to run or drip - therefore, the paper had to stay flat.
Cue lots of sampling on scrap bits of paper, lots of practises, a whole kitchen roll of paintbrush blotting, and plenty of tiny pencils!
Working my way through
I started drawing properly in January 2024, and finished at the end of March. I was also doing another project for a different client during that time too! (What’s that they say about things that are sometimes like waiting for buses…?)
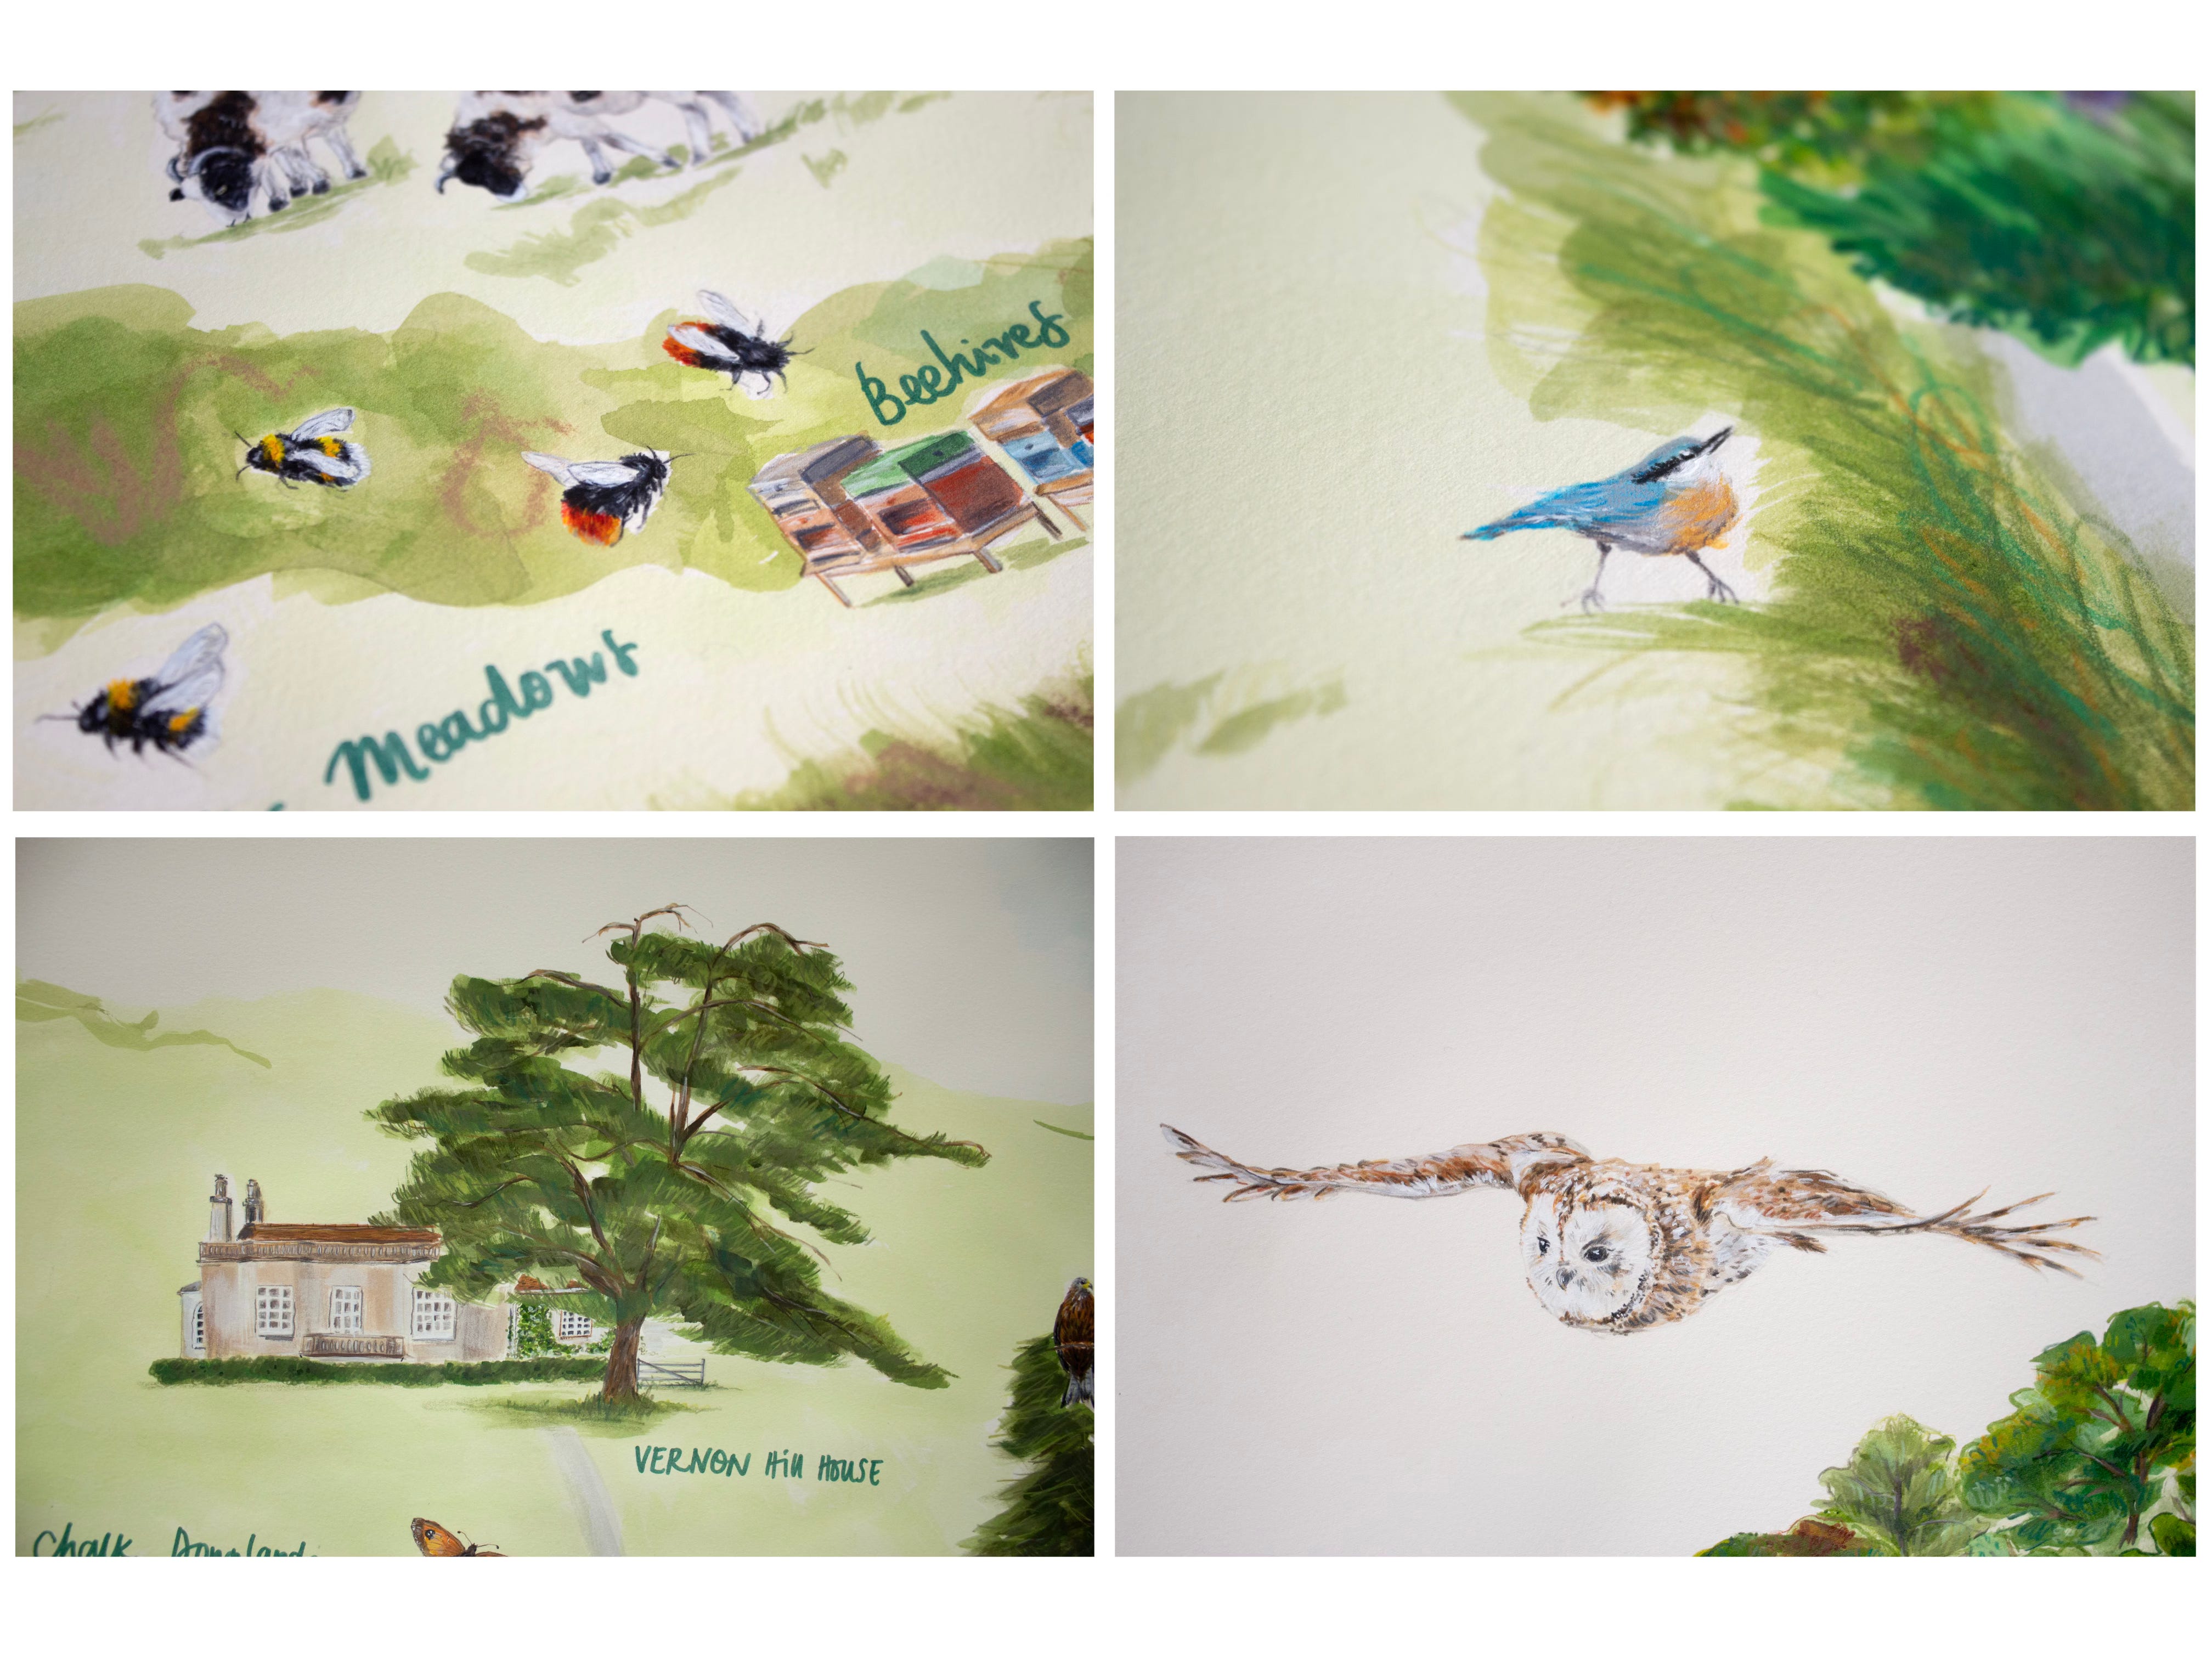
I worked my way through, slow and steady, one part at a time, rather than doing a bit of everything. This was mainly because I didn’t have the space for the entire paper to be stretched out, but also I needed to be able to get up close to work on the parts that needed finer details in them.
Some examples are - the bumblebees down by the river (each bee is roughly the size of my thumb, that is how much the scale varied!); a little blue Nuthatch, perched in the hedgerow is also of a similar size; a flying owl above the woods (the owl is about the size of my hand); and, of course, the buildings - all roughly A5 in size.
So a lot of variation and many elements to consider.
Final adjustments
Client work has deadlines, such is its nature after all. So as much as I wanted to have endlessly tweaked and adjusted, the Map needed to be finished and taken to the framers in London, so that a frame could be made and sent on to the client.
I don’t know about you, but I always find things in my work I would like to change, and there is no exception here. No, I’d rather not tell you those things are - I have to have some secrets - but overall, I was really happy with the outcome! To work at such a scale on an original piece of artwork I found quite a personal feat.
Also, knowing how messy I am, the fact that paper is pristine and that nothing was spilt…was a miracle!
Taking it to the framers
The client organised the framing as they had a particular aesthetic in mind, but they asked for my opinion along the way. I drove the map up to London and dropped it off, with the help of my partner I must add, as it was far too big for me to get out of the car on my own. Plus the journey up felt like transporting the crown jewels… it was tense, I had very precious cargo!
I dropped it off at Frame London, who are a family-owned business and they couldn’t have been more helpful. They did a brilliant job on the mounting and framing of the Map itself, and allowed me inside to discuss key aspects of the paper etc. based on my experiences using it over the previous three months.
In the Tasting Room
After a site visit, taking lots of photographs, research and reading lots of wildlife surveys, rough sketches, ideas, and 4 months' of drawing and painting later…

This is the final Map! It has been beautifully float-mounted and framed and is now hung in the entrance of the Tasting Room in the vineyard.
As soon as you walk through the door it is right in front of you. I am so excited to see it in person, and when I do, I will be taking some more photos!
In the meantime, there is a small blurb about me and my process for the map (and the black and white rough) up on the website. You can read it here.
Finally, if you’re considering whether an illustrated map could enhance your business, please feel free to get in touch. Illustrated maps have so many uses and applications - from editorials in magazines, leaflets showing country walks around a park, showcasing where your shops are around a city, or even for wedding guest information.
Also, I would love to hear from you if this has sparked an idea - we can work on one together!
Until next time,
This is amazing! 🙌